VPC with servers in private subnets and NAT


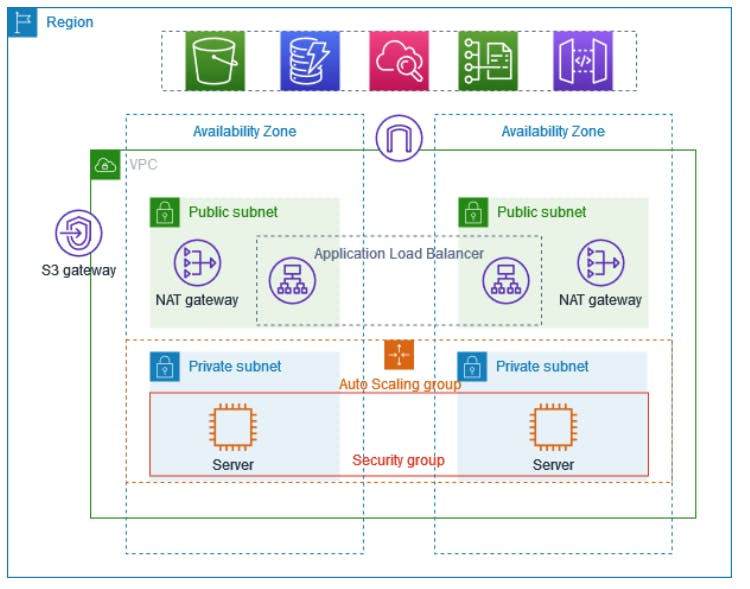
This example demonstrates how to create a VPC that you can use for servers in a production environment. To improve resiliency, you deploy the servers in two Availability Zones, by using an Auto Scaling group and an Application Load Balancer. For additional security, you deploy the servers in private subnets. The servers receive requests through the load balancer. The servers can connect to the internet by using a NAT gateway. To improve resiliency, you deploy the NAT gateway in both Availability Zones.
Contents
Overview
Create a VPC
Deploy Your Application
Test Your Application
Clean Up
Overview
The VPC has public subnets and private subnets in two Availability Zones. Each public subnet contains a NAT gateway and a load balancer node. The servers run in the private subnets, are launched and terminated by using an Auto Scaling group, and receive traffic from the load balancer. The servers can connect to the internet by using the NAT gateway. The servers can connect to Amazon S3 by using a gateway VPC endpoint.
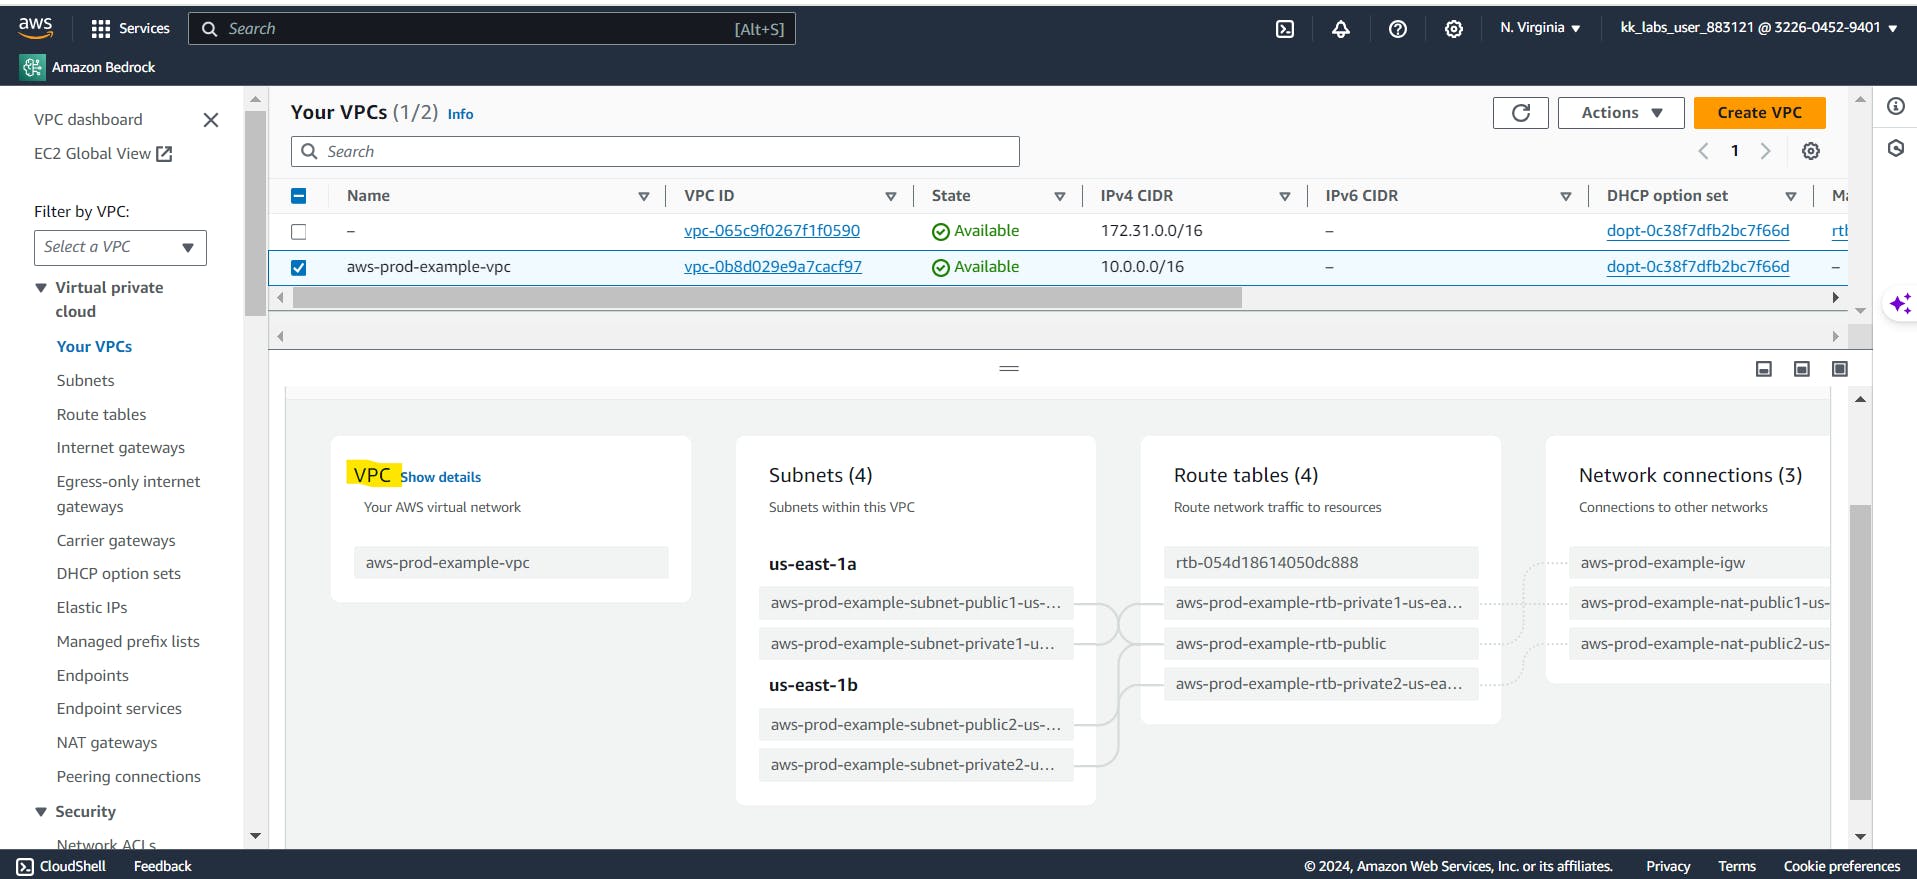
Create the VPC
Use the following procedure to create a VPC with a public subnet and a private subnet in two Availability Zones, and a NAT gateway in each Availability Zone.
To create the VPC
Open the Amazon VPC console at https://console.aws.amazon.com/vpc/.
On the dashboard, choose Create VPC.
For Resources to create, choose VPC and more.
Configure the VPC
For Name tag auto-generation, enter a name for the VPC.
For IPv4 CIDR block, you can keep the default suggestion, or alternatively you can enter the CIDR block required by your application or network.
If your application communicates by using IPv6 addresses, choose IPv6 CIDR block, Amazon-provided IPv6 CIDR block.
Configure the subnets
For Number of Availability Zones, choose 2, so that you can launch instances in multiple Availability Zones to improve resiliency.
For Number of public subnets, choose 2.
For Number of private subnets, choose 2.
You can keep the default CIDR block for the public subnet, or alternatively you can expand Customize subnet CIDR blocks and enter a CIDR block. For more information, see Subnet CIDR blocks.
For NAT gateways, choose 1 per AZ to improve resiliency.
If your application communicates by using IPv6 addresses, for Egress only internet gateway, choose Yes.
For VPC endpoints, if your instances must access an S3 bucket, keep the S3 Gateway default. Otherwise, instances in your private subnet can't access Amazon S3. There is no cost for this option, so you can keep the default if you might use an S3 bucket in the future. If you choose None, you can always add a gateway VPC endpoint later on.
For DNS options, clear Enable DNS hostnames.
Choose Create VPC.
Create your launch template (console)
The following steps describe how to configure a basic launch template:
Specify the Amazon Machine Image (AMI) from which to launch the instances.
Choose an instance type that is compatible with the AMI that you specify.
Specify the key pair to use when connecting to instances, for example, using SSH.
Add one or more security groups to allow network access to the instances.
Specify whether to attach additional volumes to each instance.
Add custom tags (key-value pairs) to the instances and volumes.
To create a launch template
Open the Amazon EC2 console at https://console.aws.amazon.com/ec2/.
On the navigation pane, under Instances, choose Launch Templates.
Choose Create launch template. Enter a name and provide a description for the initial version of the launch template.
(Optional) Under Auto Scaling guidance, select the check box to have Amazon EC2 provide guidance to help create a template to use with Amazon EC2 Auto Scaling.
Under Launch template contents, fill out each required field and any optional fields as needed.
Application and OS Images (Amazon Machine Image): (Required) Choose the ID of the AMI for your instances. You can search through all available AMIs, or select an AMI from the Recents or Quick Start list. If you don't see the AMI that you need, choose Browse more AMIs to browse the full AMI catalog.
To choose a custom AMI, you must first create your AMI from a customized instance. For more information, see Create an AMI in the Amazon EC2 User Guide for Linux Instances.
For Instance type, choose a single instance type that's compatible with the AMI that you specified.
Alternatively, to use attribute-based instance type selection, choose Advanced, Specify instance type attributes, and then specify the following options:
Number of vCPUs: Enter the minimum and maximum number of vCPUs. To indicate no limits, enter a minimum of 0, and keep the maximum blank.
Amount of memory (MiB): Enter the minimum and maximum amount of memory, in MiB. To indicate no limits, enter a minimum of 0, and keep the maximum blank.
Expand Optional instance type attributes and choose Add attribute to further limit the types of instances that can be used to fulfill your desired capacity.
Resulting instance types: You can view the instance types that match the specified compute requirements, such as vCPUs, memory, and storage.
To exclude instance types, choose Add attribute. From the Attribute list, choose Excluded instance types. From the Attribute value list, select the instance types to exclude.
Key pair (login): For Key pair name, choose an existing key pair, or choose Create new key pair to create a new one.
Network settings: For Firewall (security groups), use one or more security groups, or keep this blank and configure one or more security groups as part of the network interface.
If you don't specify any security groups in your launch template, Amazon EC2 uses the default security group for the VPC that your Auto Scaling group will launch instances into. By default, this security group doesn't allow inbound traffic from external networks.
Do one of the following:
Change the default network interface settings. For example, you can enable or disable the public IPv4 addressing feature, which overrides the auto-assign public IPv4 addresses setting on the subnet.
Skip this step to keep the default network interface settings.
Do one of the following:
Modify the storage configuration.
Skip this step to keep the default storage configuration.
For Resource tags, specify tags by providing key and value combinations. If you specify instance tags in your launch template and then you choose to propagate your Auto Scaling group's tags to its instances, all the tags are merged. If the same tag key is specified for a tag in your launch template and a tag in your Auto Scaling group, then the tag value from the group takes precedence.
(Optional) Configure advanced settings. For example, you can choose an IAM role that your application can use when it accesses other AWS resources or specify the instance user data that can be used to perform common automated configuration tasks after an instance starts.
When you are ready to create the launch template, choose Create launch template.
To create an Auto Scaling group, choose Create Auto Scaling group from the confirmation page.
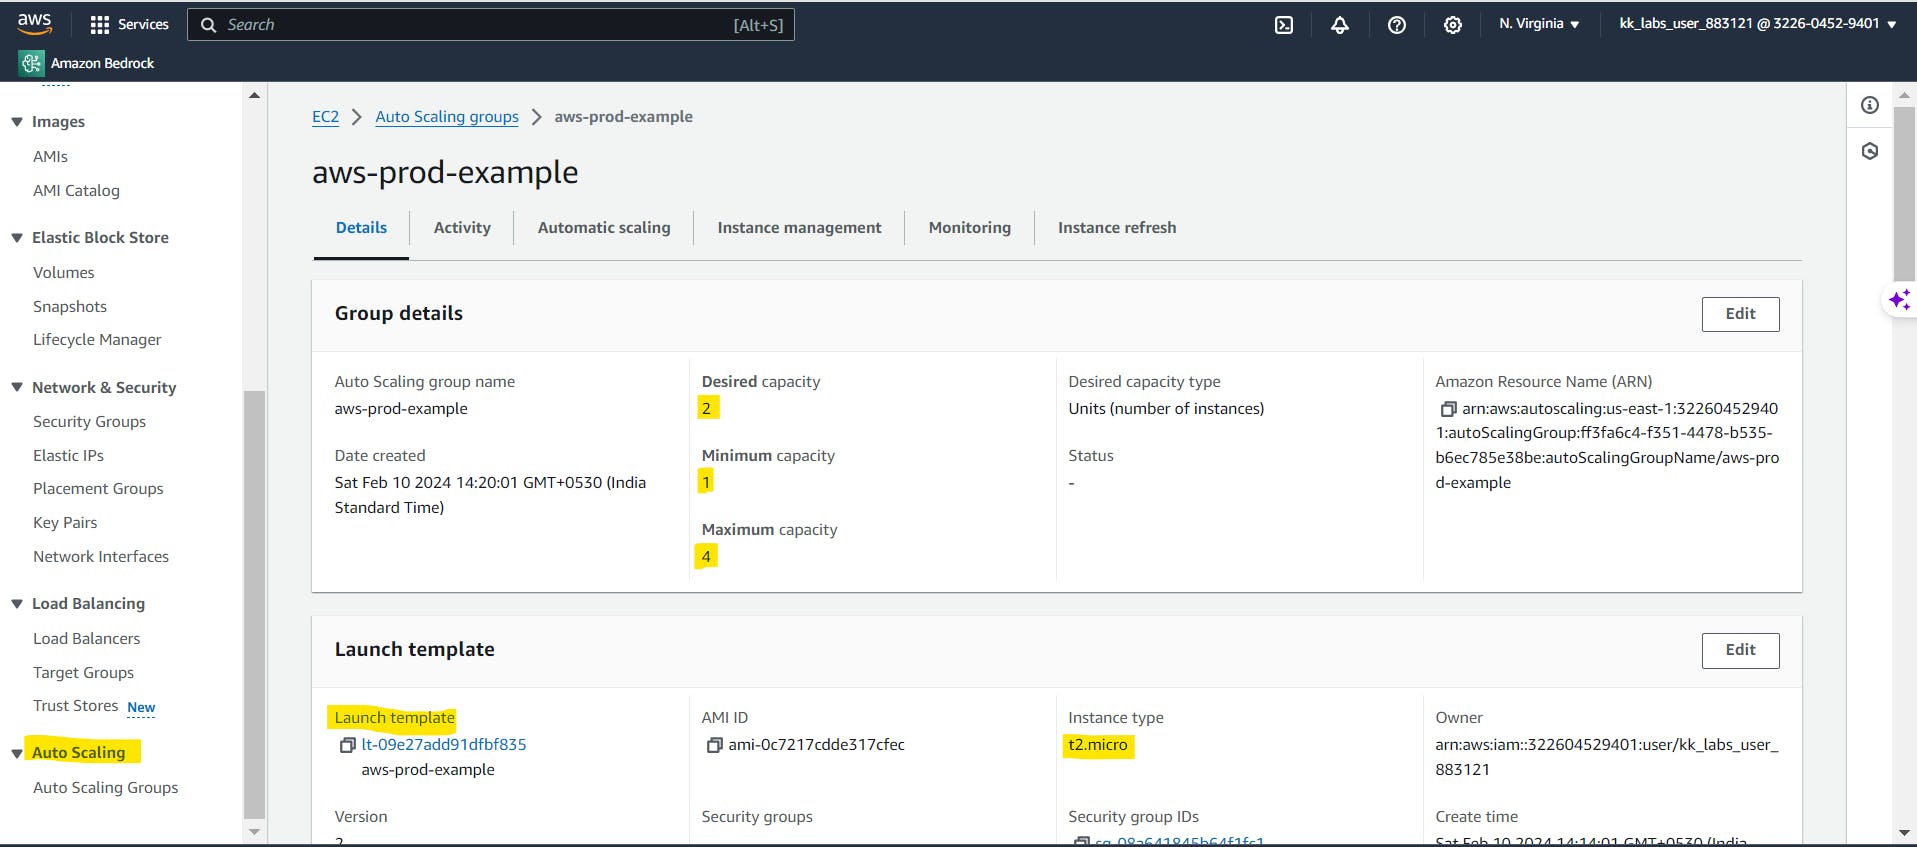
Create ASG (Auto Scaling Group)
If you have created a launch template, you can create an Auto Scaling group that uses a launch template as a configuration template for its EC2 instances. The launch template specifies information such as the AMI ID, instance type, key pair, security groups, and block device mapping for your instances.
Create a Bastion Host
The EC2 instances created by the Autoscaling group are in the Private subnet we created. The instances don't have a public IP address. To access the instances, we need to have an instance deployed in the public subnet which is known as the Bastion host.
Create a simple instance from the ec2 instance launch. with the basic requirements of instance type t2.micro and this will have access to the public internet.
Connect the Bastion host with the ssh connection.
scp -i /users/xyz/Downloads/aws-login.pem /users/xyz/Downloads/aws-login.pem ubuntu@<public-ip bastion host
ssh -i ubuntu@<public-ip of Bastion host>
The above command will ssh into the Bastion host. Now we will ssh into the private instances which are located into the private subnet. Always try to visualize the diagram. The following commands shows how to ssh to the another private subnet instances.
ssh -i aws-login ubuntu@<private-IP-instance1>
Now you will be in the one of the instances from the Private subnet, Here you need to install the application the sample app I have installed here is with the python3
<!DOCTYPE html>
<html>
<head>
<title>Page Title</title>
</head>
<body>

<h1>This is a Heading</h1>
<p>This is a paragraph.</p>

</body>
</html>
Then, To start the application try using the below command in the private subnet instance. Make sure to remember the Port you opened in the command. here I have opened the 8000 port to be accessed by the load balancer which will be created in the next step.
pyhon3 -m http.server 8000
Create a ALB (Application Load Balancer)
A load balancer serves as the single point of contact for clients. The load balancer distributes incoming application traffic across multiple targets, such as EC2 instances, in multiple Availability Zones. This increases the availability of your application. You add one or more listeners to your load balancer.
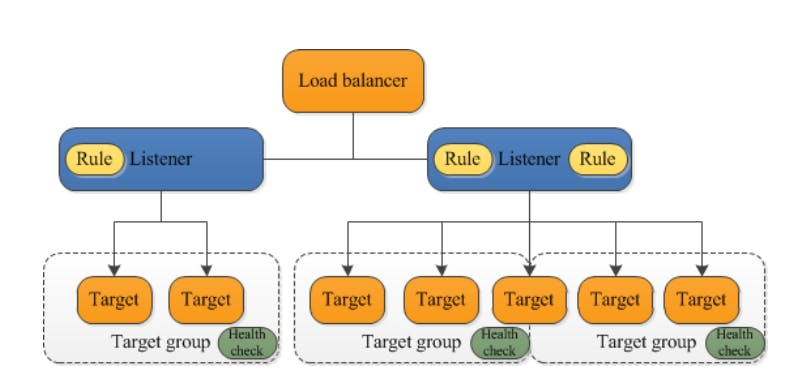
Before creating the ALB, we must configure the Target Group. When you create a target group, you specify its target type, which determines the type of target you specify when registering targets with this target group. After you create a target group, you cannot change its target type.
The following are the possible target types:
instanceThe targets are specified by instance ID.
ipThe targets are IP addresses.
lambdaThe target is a Lambda function.
For Our Application, we choose to go with the instance target group. and Create a target group as shown below. The Targets Should be selected in those two instances from the private subnet.

Now the load balancer tab and choose the DNS and hit enter with the browser pasting the same.
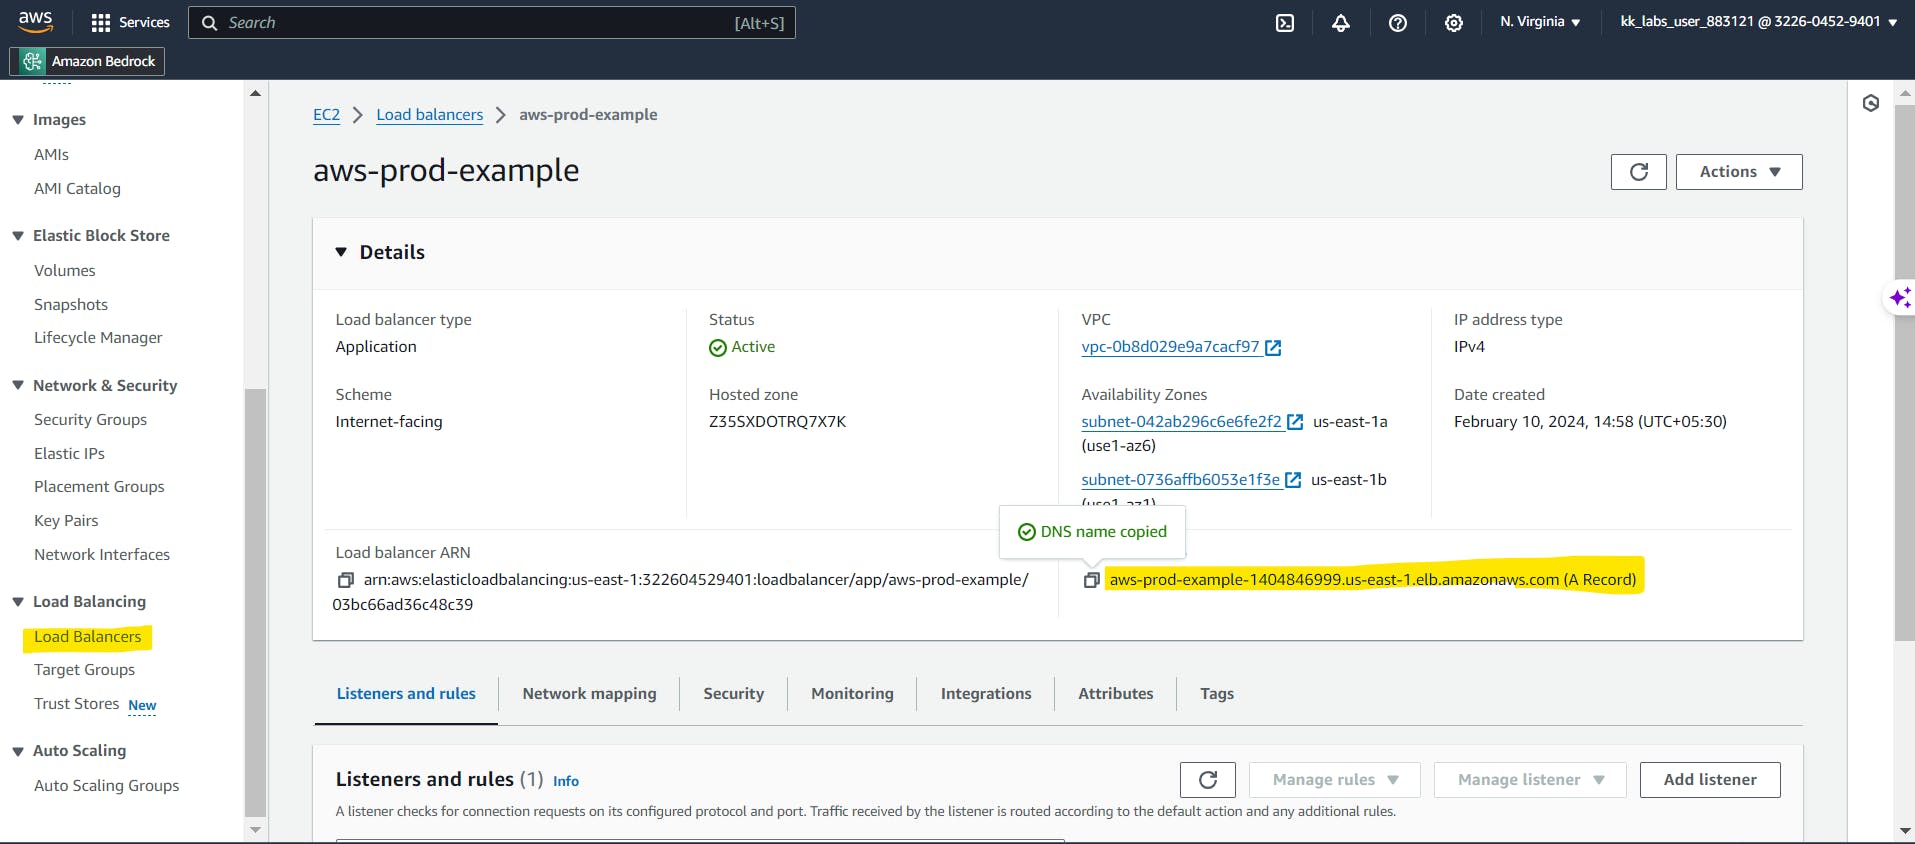
You should get the deployed applications data on the screen. If you are not seeing anything on the screen try to check the security group port, 80 port should be opened in the inbound traffic of an ALB (app load balancer).
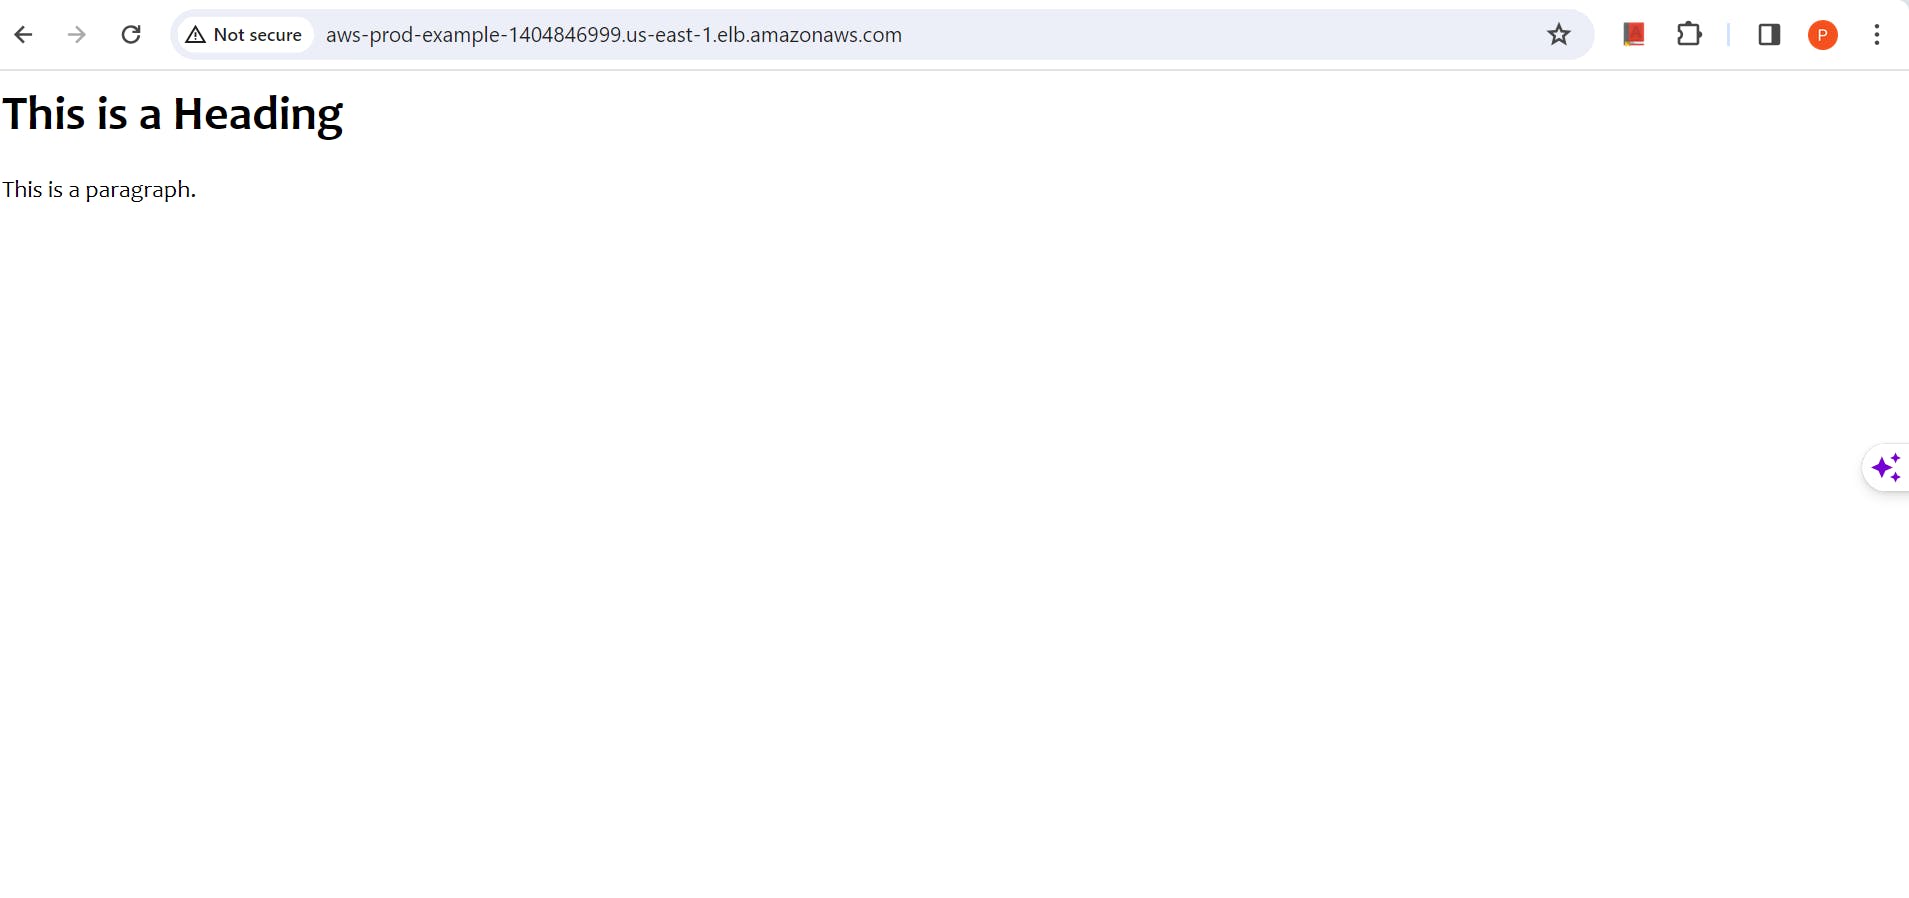
In this way try to hit many times so that the load balancer will give the contents from both the instances. as below .
The App from instance 1
Change the code in the 2nd private instance and then apply the same mentioned in the document above as well below and try refreshing the screen.
python3 -m http.server 8000
The instance2 from the screen gives the below output. As i have pasted the same code it is giving the same output but the load balancer will balances the load according to the load it takes.
Clean Up
Always try to clean up the created services. As the NAT gateway is a paid service and cost too much for the beginner in AWS. Clear ASG, ALB, Instances as well as VPC.